Resting Hand Splint Pattern
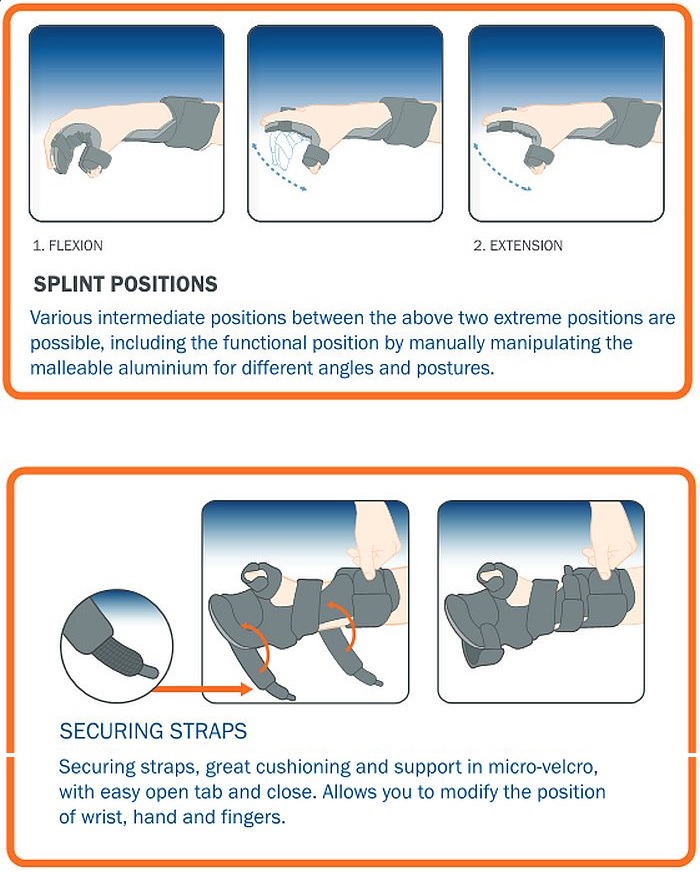
Resting Hand Splint Pattern - † it is designed to hold the wrist, hand and fingers in a neutral position to aid rehabilitation or reduce pain. These splints may be prefabricated or custom made by your therapist. Navicular injuries, scaphoid fractures, dislocations, ucl sprains. Support the wrist and joints of your fingers and thumb in correct position. Web what is a resting hand splint? So this is a step by step guide on how to make a resting splint. Ensure that the radial edge of the splint lies diagonally. Position the thumb and mould the material around it. Do the same at the proximal end. Shop & save at alimed.com. Rhs (resting hand splint) reasons for splinting: Position the thumb and mould the material around it. Undo all velcro straps on the splint and place in front of the patient’s weak arm. Ensure that the radial edge of the splint lies diagonally. The proximal interphalangeal (pip) and distal interphalangeal (dip). It should only be used as These splints may be prefabricated or custom made by your therapist. Web resting hand splint application the purpose of a hand splint is to: Properly position and protect the affected hand; Web the thermoplastic material chosen for this orthosis must be rigid enough to support the patient’s limb, but easily molded to contour and drape to the exact anatomy. Resting hand splints have many advantages: Rinse splint well and gently towel dry. Using the fingertips, grasp both edges near the wrist. It explains what the splint does, how to use is and care for it, and what to do if you have any problems. Support the wrist and joints of your fingers and thumb in correct position. Molded in a stationary position with the tissues at maximum length. • increase functional range of motion • prevent or decrease muscle tightness • support areas that may need rest or healing care and cleaning: Web a resting hand split will help your hands be in a natural position. Navicular injuries, scaphoid fractures, dislocations, ucl sprains. Turn the forearm back. Position the thumb and mould the material around it. † it is designed to hold the wrist, hand and fingers in a neutral position to aid rehabilitation or reduce pain. Web the thermoplastic material chosen for this orthosis must be rigid enough to support the patient’s limb, but easily molded to contour and drape to the exact anatomy. Web the. In this blog, we break down some of our tips and tricks for accurate pattern making and molding of this important orthotic design. † the aim is to maintain / increase range of motion (rom) at the wrist and fingers; Start by wearing for 15 minute periods three to four times daily. Apply splint starting at thumb,. 12 hours overnight. So this is a step by step guide on how to make a resting splint. Start by wearing for 15 minute periods three to four times daily. Web resting hand splint application the purpose of a hand splint is to: This helps with hand hygiene. For the index and long fingers, use a radial gutter splint. Turn the forearm back in pronation before the material hardens. Web a resting hand split will help your hands be in a more natural position. Undo all velcro straps on the splint and place in front of the patient’s weak arm. Can help reduce pain, swelling, and stiffness in the wrists and fingers. Web resting hand splints maintains hand in. So this is a step by step guide on how to make a resting splint. Web what is a resting hand splint? Shop & save at alimed.com. Undo all velcro straps on the splint and place in front of the patient’s weak arm. Web types of splints. Pull hard and stick the ends together. Support the wrist and joints of your fingers and thumb in a better position. Apply splint starting at thumb,. Wait until the material begins to harden slightly, and mould a cone that lies diagonally and fits snugly in the palm of the hand. Undo all velcro straps on the splint and place in. Support the wrist and joints of your fingers and thumb in a better position. Resting hand splints provide a slow and prolonged stretch to the muscles and ligaments in the upper extremity. Using the splint you will be shown how to use the splint. It should only be used as Shop & save at alimed.com. Web the two most common positions used for wrist and hand orthoses are the resting hand position (or functional hand position) and the antideformity position, also known as the intrinsic plus position. Rinse splint well and gently towel dry. Apply splint starting at thumb,. Place the forearm in the large trough. Resting hand splints have many advantages: Ensure that the radial edge of the splint lies diagonally. Web one intervention used to treat spasticity is resting hand splints. 4 hours movement* • frequent serial adjustment • when resolved: Place the forearm in the large trough. Rhs (resting hand splint) reasons for splinting: Web this leaflet is for patients who have been given a resting splint to wear. • splint should be washed by hand in warm water using a mild detergent. Web resting hand splint application the purpose of a hand splint is to: Apply splint starting at thumb,. Shop & save at alimed.com. † the aim is to maintain / increase range of motion (rom) at the wrist and fingers; Mobilize & provided a constant force to the joint. Web the thermoplastic material chosen for this orthosis must be rigid enough to support the patient’s limb, but easily molded to contour and drape to the exact anatomy. Can help reduce pain, swelling, and stiffness in the wrists and fingers. This helps with hand hygiene. Cut splint, stretch splint padding over both fiberglass edges, add minimal water, blot.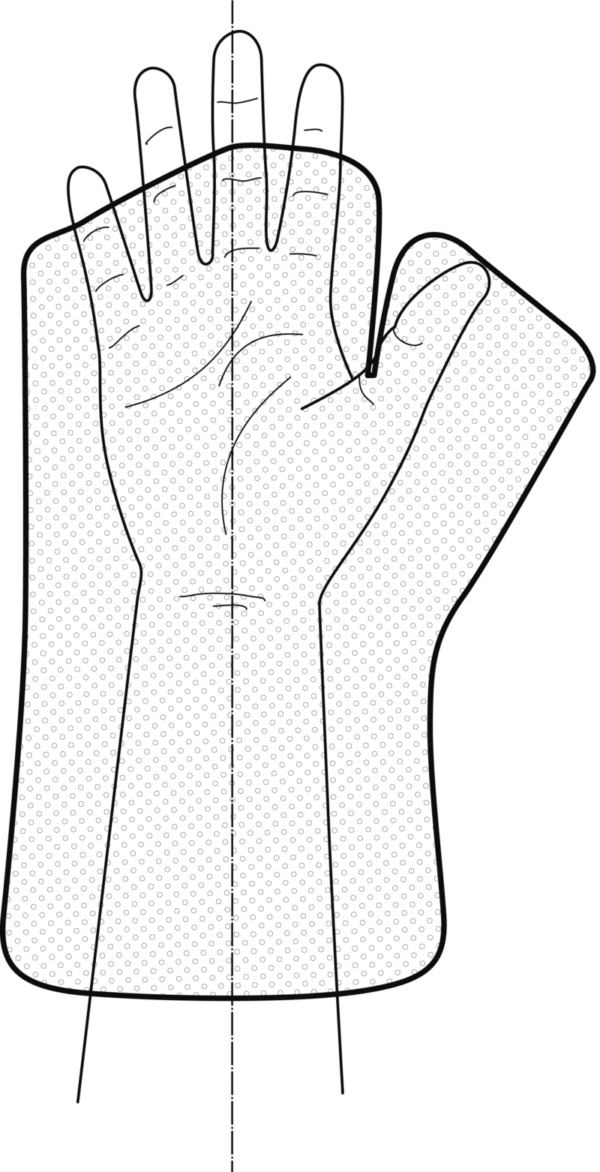
Guide Rheumatoid resting splint
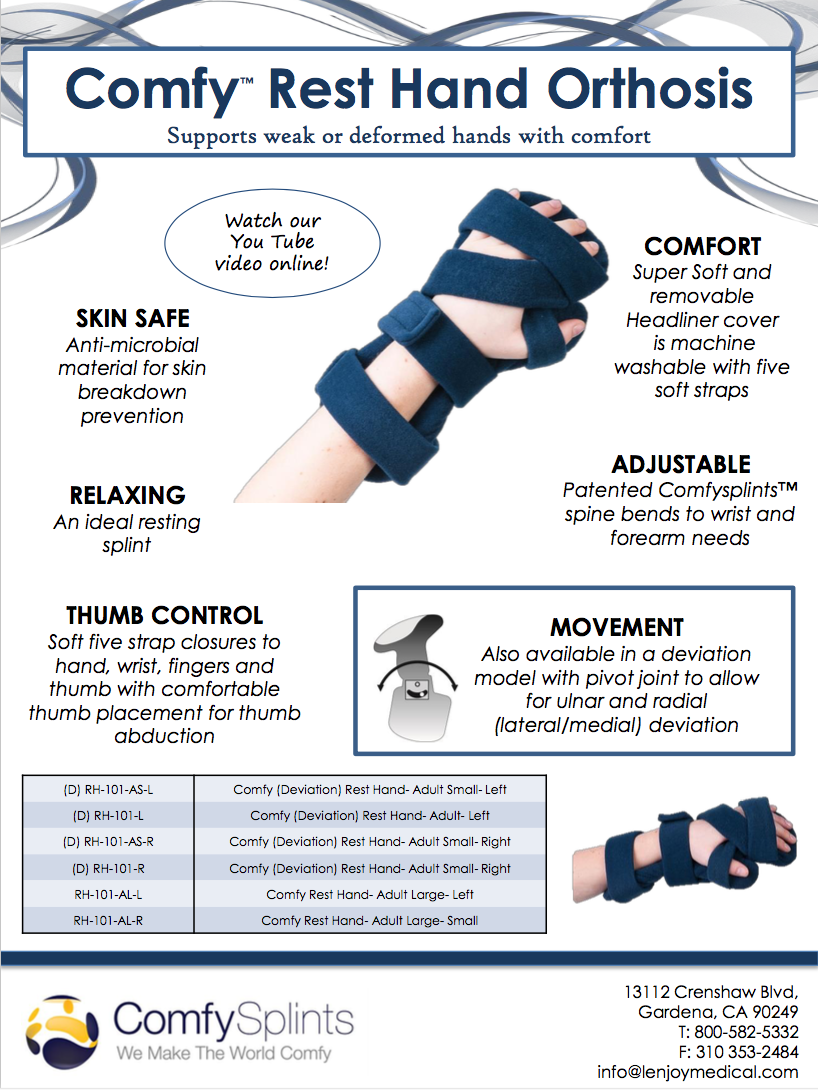
ComfySplints™ Rest Hand Comfy Splints
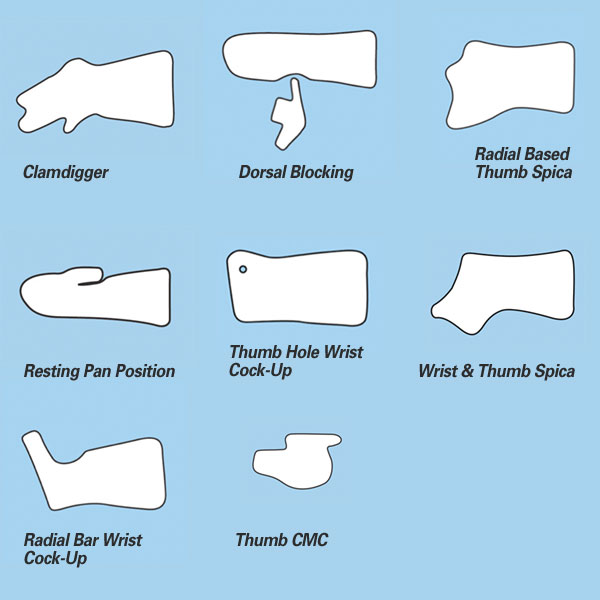
Hand Splint Patterns North Coast Medical
Mathi Hand Resting Splint Health and Care

SoftPro Palmar Resting Hand Splint

Guide Static Hand resting splint
Guide Static Hand resting splint

How clever! A modified resting hand position splint. Made out of a
Guide Conical resting splint

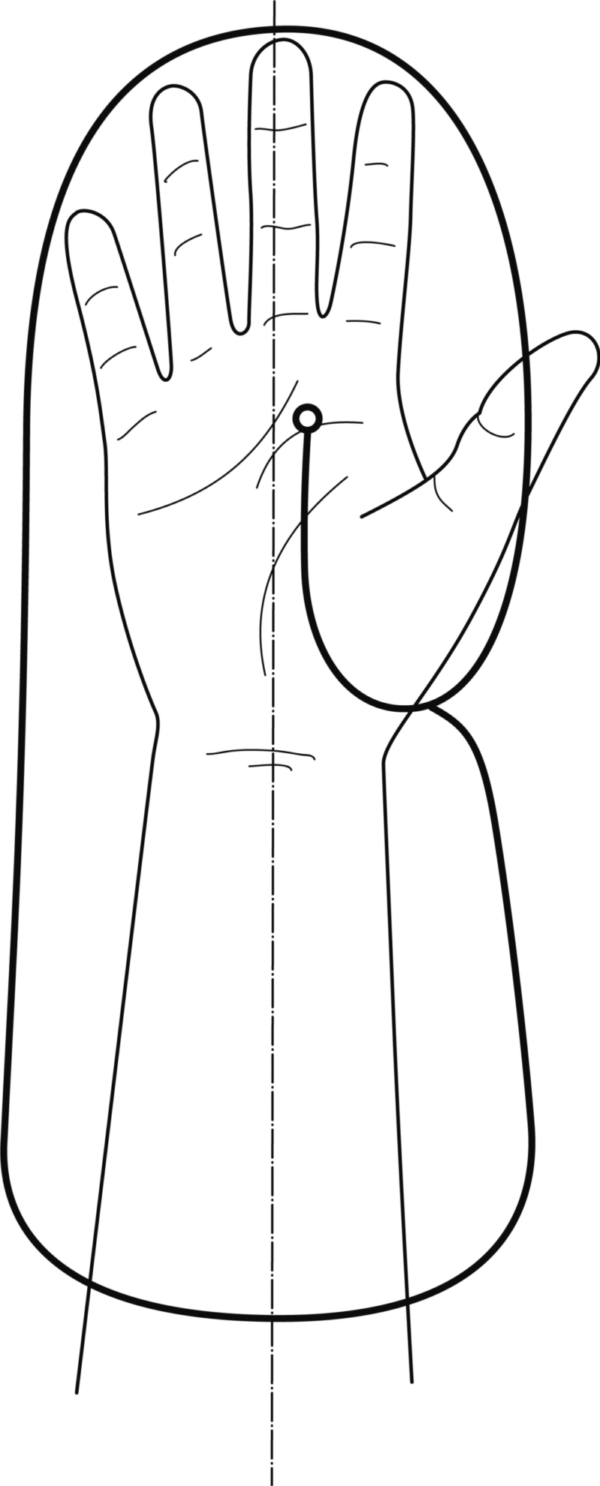
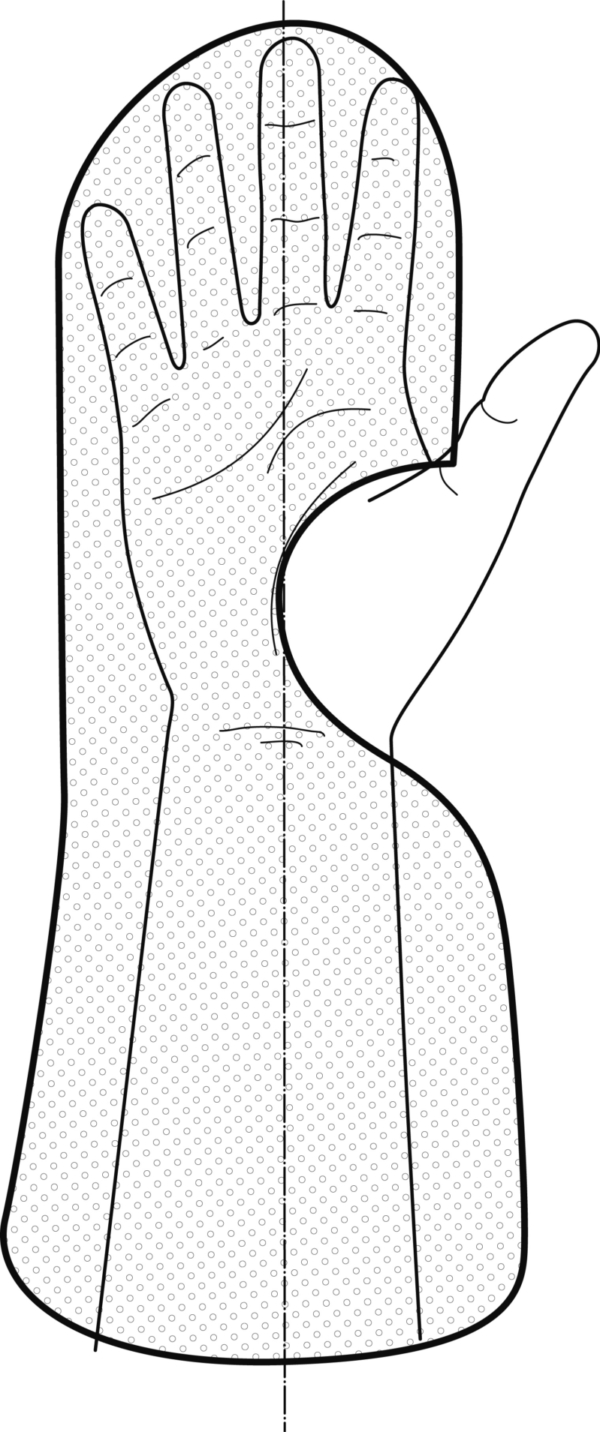
How to make a pattern for a Resting Pan Orthosis (Volar Wrist Hand
Web A Resting Hand Split Will Help Your Hands Be In A More Natural Position.
Using The Fingertips, Grasp Both Edges Near The Wrist.
Web The Two Most Common Positions Used For Wrist And Hand Orthoses Are The Resting Hand Position (Or Functional Hand Position) And The Antideformity Position, Also Known As The Intrinsic Plus Position.
The Proximal Interphalangeal (Pip) And Distal Interphalangeal (Dip).
Related Post: